
Watch Now This tutorial has a related video course created by the Real Python team. Watch it together with the written tutorial to deepen your understanding: Using Jupyter Notebooks
The Jupyter Notebook is an open source web application that you can use to create and share documents that contain live code, equations, visualizations, and text. Jupyter Notebook is maintained by the people at Project Jupyter.
Jupyter Notebooks are a spin-off project from the IPython project, which used to have an IPython Notebook project itself. The name, Jupyter, comes from the core supported programming languages that it supports: Julia, Python, and R. Jupyter ships with the IPython kernel, which allows you to write your programs in Python, but there are currently over 100 other kernels that you can also use.
Free Bonus: 5 Thoughts On Python Mastery, a free course for Python developers that shows you the roadmap and the mindset you’ll need to take your Python skills to the next level.
Getting Up and Running With Jupyter Notebook
The Jupyter Notebook is not included with Python, so if you want to try it out, you will need to install Jupyter.
There are many distributions of the Python language. This article will focus on just two of them for the purposes of installing Jupyter Notebook. The most popular is CPython, which is the reference version of Python that you can get from their website. It is also assumed that you are using Python 3.
Installation
If so, then you can use a handy tool that comes with Python called pip to install Jupyter Notebook like this:
$ pip install jupyter
The next most popular distribution of Python is Anaconda. Anaconda has its own installer tool called conda that you could use for installing a third-party package. However, Anaconda comes with many scientific libraries preinstalled, including the Jupyter Notebook, so you don’t actually need to do anything other than install Anaconda itself.
Starting the Jupyter Notebook Server
Now that you have Jupyter installed, let’s learn how to use it. To get started, all you need to do is open up your terminal application and go to a folder of your choice. I recommend using something like your Documents folder to start out with and create a subfolder there called Notebooks or something else that is easy to remember.
Then just go to that location in your terminal and run the following command:
$ jupyter notebook
This will start up Jupyter and your default browser should start (or open a new tab) to the following URL: http://localhost:8888/tree
Your browser should now look something like this:

Note that right now you are not actually running a Notebook, but instead you are just running the Notebook server. Let’s actually create a Notebook now!
Creating a Notebook
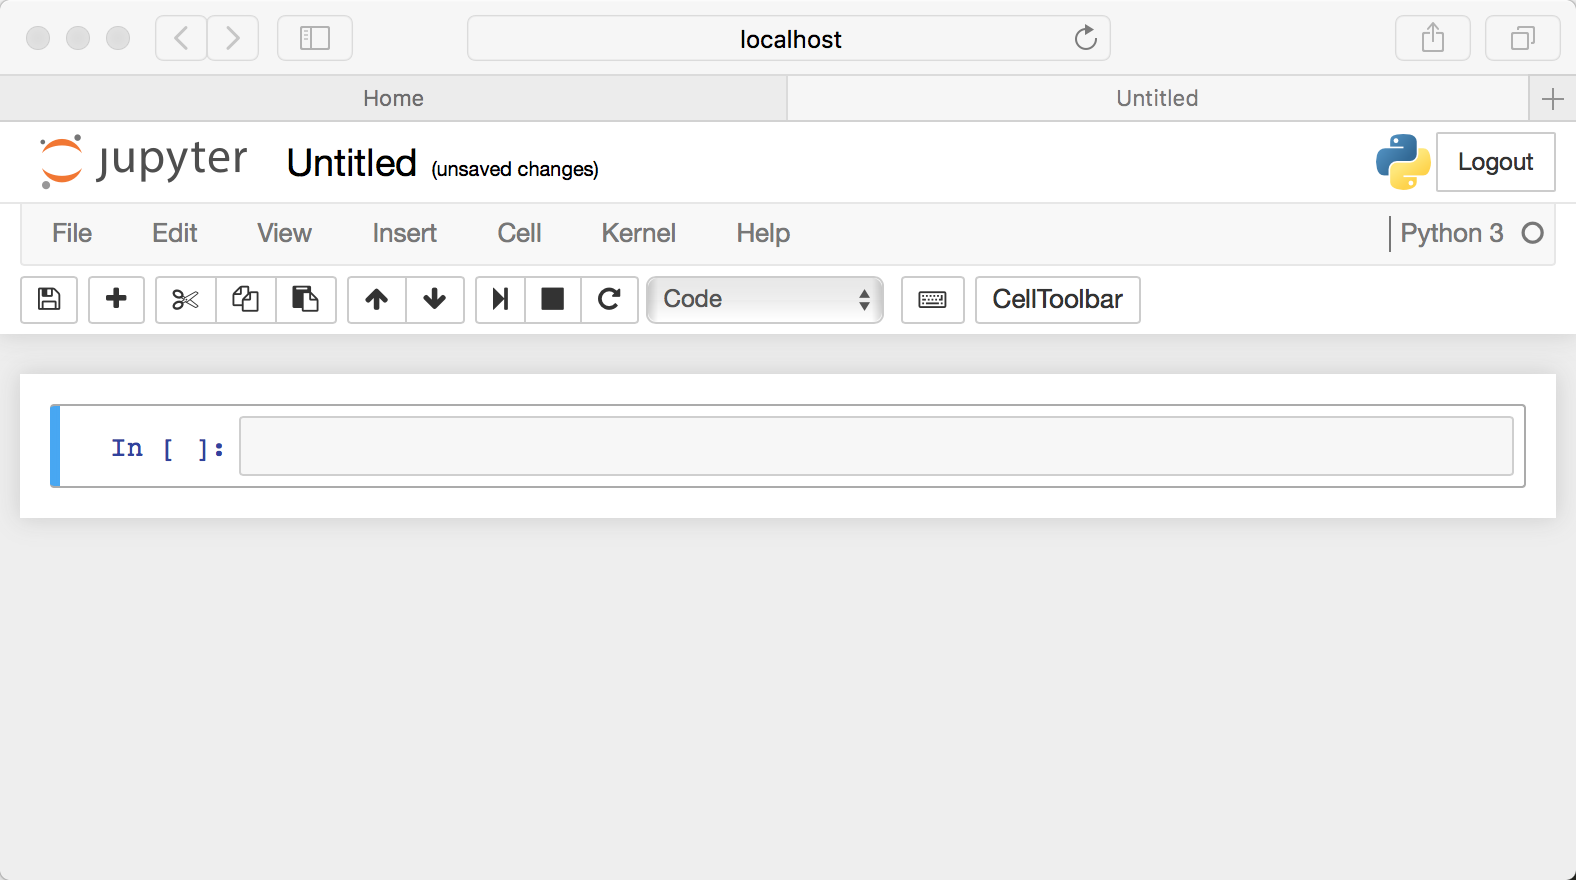
Now that you know how to start a Notebook server, you should probably learn how to create an actual Notebook document.
All you need to do is click on the New button (upper right), and it will open up a list of choices. On my machine, I happen to have Python 2 and Python 3 installed, so I can create a Notebook that uses either of these. For simplicity’s sake, let’s choose Python 3.
Your web page should now look like this:
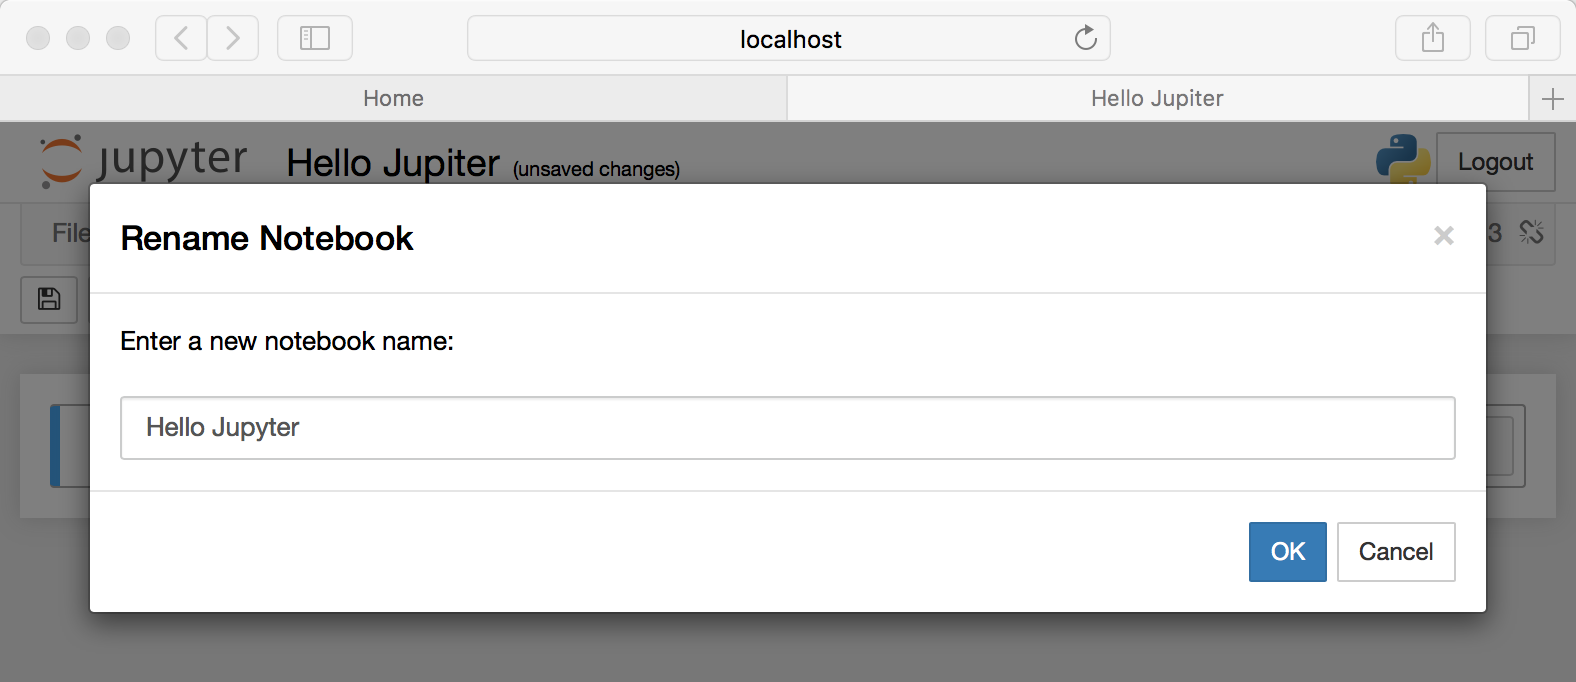
Naming
You will notice that at the top of the page is the word Untitled. This is the title for the page and the name of your Notebook. Since that isn’t a very descriptive name, let’s change it!
Just move your mouse over the word Untitled and click on the text. You should now see an in-browser dialog titled Rename Notebook. Let’s rename this one to Hello Jupyter:
Running Cells
A Notebook’s cell defaults to using code whenever you first create one, and that cell uses the kernel that you chose when you started your Notebook.
In this case, you started yours with Python 3 as your kernel, so that means you can write Python code in your code cells. Since your initial Notebook has only one empty cell in it, the Notebook can’t really do anything.
Thus, to verify that everything is working as it should, you can add some Python code to the cell and try running its contents.
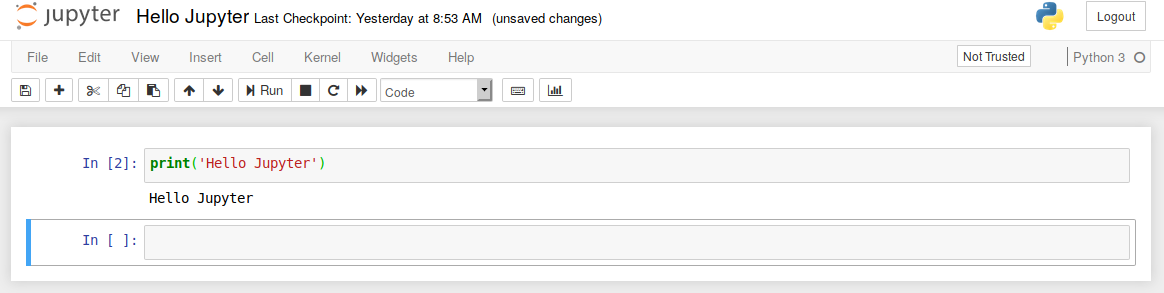
Let’s try adding the following code to that cell:
print('Hello Jupyter!')
Running a cell means that you will execute the cell’s contents. To execute a cell, you can just select the cell and click the Run button that is in the row of buttons along the top. It’s towards the middle. If you prefer using your keyboard, you can just press Shift+Enter.
When I ran the code above, the output looked like this:
If you have multiple cells in your Notebook, and you run the cells in order, you can share your variables and imports across cells. This makes it easy to separate out your code into logical chunks without needing to reimport libraries or recreate variables or functions in every cell.
When you run a cell, you will notice that there are some square braces next to the word In to the left of the cell. The square braces will auto fill with a number that indicates the order that you ran the cells. For example, if you open a fresh Notebook and run the first cell at the top of the Notebook, the square braces will fill with the number 1.
The Menus
The Jupyter Notebook has several menus that you can use to interact with your Notebook. The menu runs along the top of the Notebook just like menus do in other applications. Here is a list of the current menus:
- File
- Edit
- View
- Insert
- Cell
- Kernel
- Widgets
- Help
Let’s go over the menus one by one. This article won’t go into detail for every single option in every menu, but it will focus on the items that are unique to the Notebook application.
The first menu is the File menu. In it, you can create a new Notebook or open a preexisting one. This is also where you would go to rename a Notebook. I think the most interesting menu item is the Save and Checkpoint option. This allows you to create checkpoints that you can roll back to if you need to.
Next is the Edit menu. Here you can cut, copy, and paste cells. This is also where you would go if you wanted to delete, split, or merge a cell. You can reorder cells here too.
Note that some of the items in this menu are greyed out. The reason for this is that they do not apply to the currently selected cell. For example, a code cell cannot have an image inserted into it, but a Markdown cell can. If you see a greyed out menu item, try changing the cell’s type and see if the item becomes available to use.
The View menu is useful for toggling the visibility of the header and toolbar. You can also toggle Line Numbers within cells on or off. This is also where you would go if you want to mess about with the cell’s toolbar.
The Insert menu is just for inserting cells above or below the currently selected cell.
The Cell menu allows you to run one cell, a group of cells, or all the cells. You can also go here to change a cell’s type, although I personally find the toolbar to be more intuitive for that.
The other handy feature in this menu is the ability to clear a cell’s output. If you are planning to share your Notebook with others, you will probably want to clear the output first so that the next person can run the cells themselves.
The Kernel cell is for working with the kernel that is running in the background. Here you can restart the kernel, reconnect to it, shut it down, or even change which kernel your Notebook is using.
You probably won’t be working with the Kernel all that often, but there are times when you are debugging a Notebook that you will find you need to restart the Kernel. When that happens, this is where you would go.
The Widgets menu is for saving and clearing widget state. Widgets are basically JavaScript widgets that you can add to your cells to make dynamic content using Python (or another Kernel).
Finally you have the Help menu, which is where you go to learn about the Notebook’s keyboard shortcuts, a user interface tour, and lots of reference material.
Starting Terminals and Other Things
Jupyter Notebook also allows you to start more than just Notebooks. You can also create a text file, a folder, or a Terminal in your browser. Go back to the home page that opened when you first started the Jupyter server at http://localhost:8888/tree. Go to the New button and choose one of the other options.
The Terminal is probably the most interesting of the bunch, as it is running your operating systems terminal in the browser. This allows you to run bash, Powershell, and so on in your browser and run any shell command that you might need to there.
Viewing What’s Running
Also on the home page of your Jupyter server (http://localhost:8888/tree) are two other tabs: Running and Clusters.
The Running tab will tell you which Notebooks and Terminals you are currently running. This is useful for when you want to shut down your server but you need to make sure that you have saved all your data. Fortunately, Notebooks auto-save pretty frequently, so you rarely lose data. But it’s good to be able to see what’s running when you need to.
The other nice thing about this tab is that you can go through your running applications and shut them down there.
Adding Rich Content
Jupyter Notebook supports adding rich content to its cells. In this section, you will get an overview of just some of the things you can do with your cells using Markup and Code.
Cell Types
There are technically four cell types: Code, Markdown, Raw NBConvert, and Heading.
The Heading cell type is no longer supported and will display a dialog that says as much. Instead, you are supposed to use Markdown for your Headings.
The Raw NBConvert cell type is only intended for special use cases when using the nbconvert command line tool. Basically it allows you to control the formatting in a very specific way when converting from a Notebook to another format.
The primary cell types that you will use are the Code and Markdown cell types. You have already learned how code cells work, so let’s learn how to style your text with Markdown.
Styling Your Text
Jupyter Notebook supports Markdown, which is a markup language that is a superset of HTML. This tutorial will cover some of the basics of what you can do with Markdown.
Set a new cell to Markdown and then add the following text to the cell:
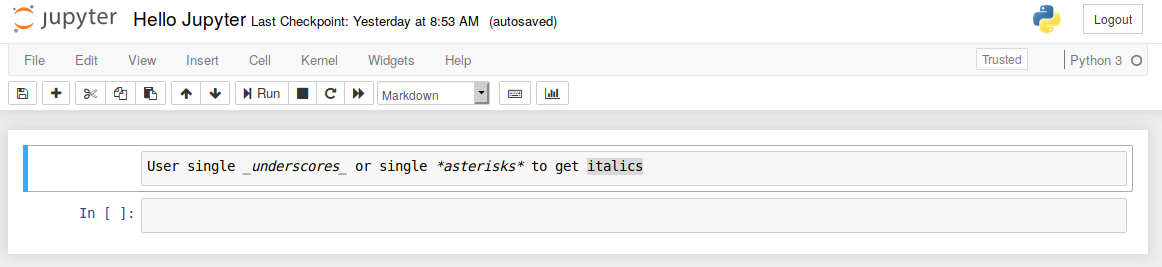
When you run the cell, the output should look like this:
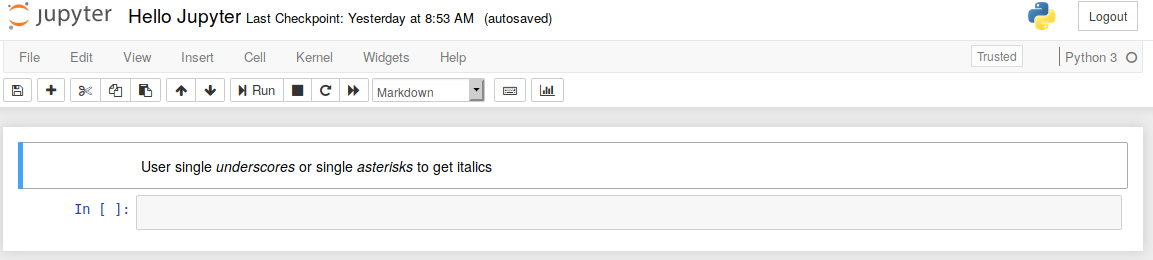
If you would prefer to bold your text, use a double underscore or double asterisk.
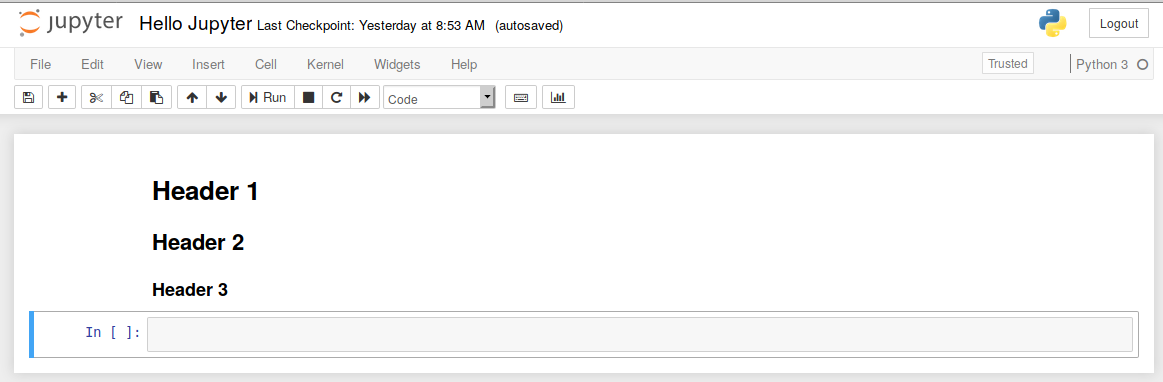
Headers
Creating headers in Markdown is also quite simple. You just have to use the humble pound sign. The more pound signs you use, the smaller the header. Jupyter Notebook even kind of previews it for you:
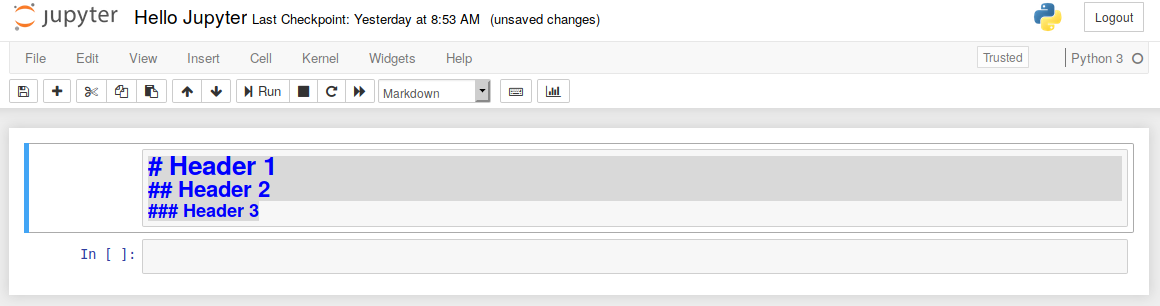
Then when you run the cell, you will end up with a nicely formatted header:
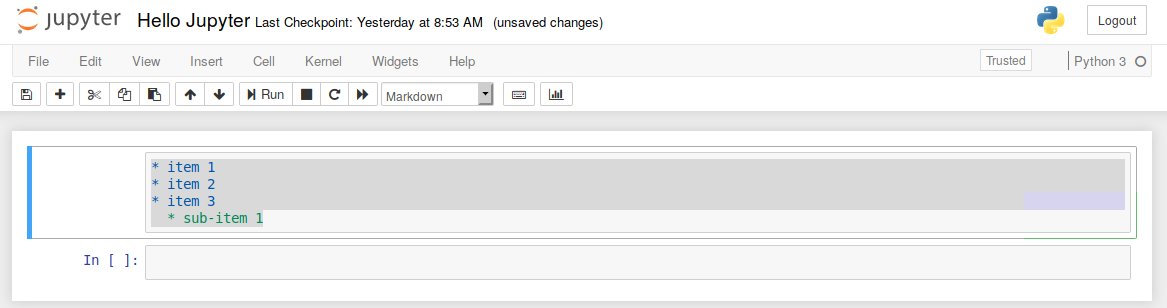
Creating Lists
You can create a list (bullet points) by using dashes, plus signs, or asterisks. Here is an example:
Code and Syntax Highlighting
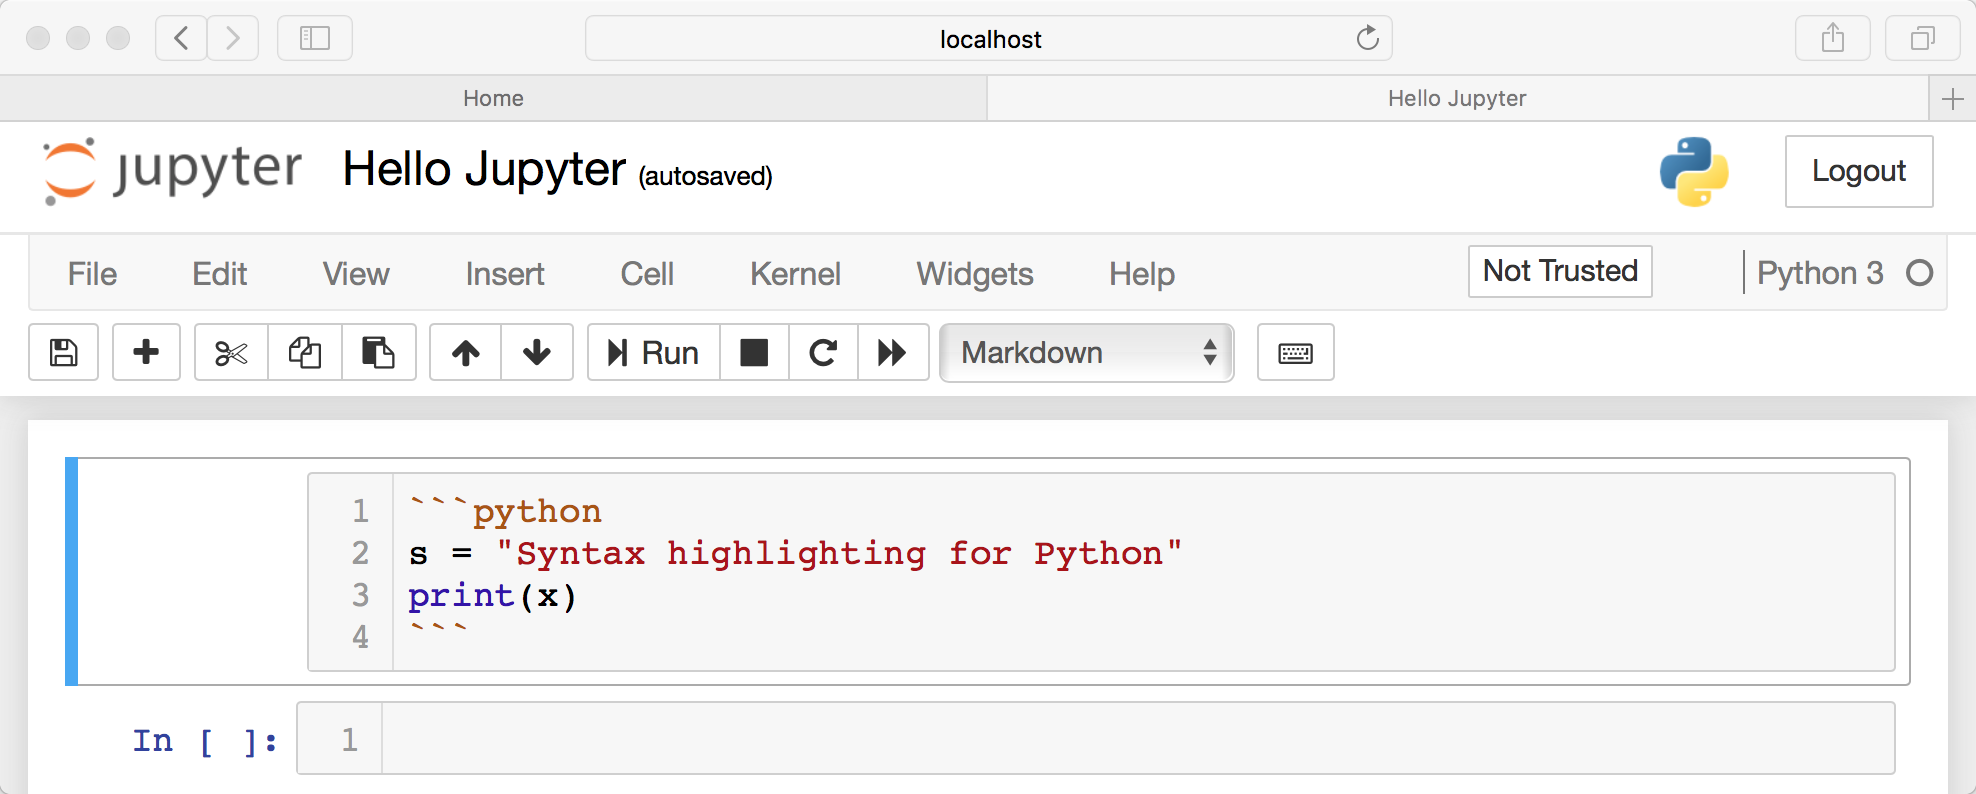
If you want to insert a code example that you don’t want your end user to actually run, you can use Markdown to insert it. For inline code highlighting, just surround the code with backticks. If you want to insert a block of code, you can use triple backticks and also specify the programming language:
Exporting Notebooks
When you are working with Jupyter Notebooks, you will find that you need to share your results with non-technical people. When that happens, you can use the nbconvert tool which comes with Jupyter Notebook to convert or export your Notebook into one of the following formats:
- HTML
- LaTeX
- RevealJS
- Markdown
- ReStructured Text
- Executable script
The nbconvert tool uses Jinja templates under the covers to convert your Notebook files (.ipynb) into these other formats.
Jinja is a template engine that was made for Python. Also note that nbconvert also depends on Pandoc and TeX to be able to export to all the formats above. If you don’t have one or more of these, some of the export types may not work. For more information, you should check out the documentation.
How to Use nbconvert
The nbconvert command does not take very many parameters, which makes learning how to use it easier. Open up a terminal and navigate to the folder that contains the Notebook you wish to convert. The basic conversion command looks like this:
$ jupyter nbconvert <input notebook> --to <output format>
Example Usage
Let’s pretend that you have a Notebook named py_examples.ipynb and you want to convert it to PDF. Here is the command you would use to do that:
$ jupyter nbconvert py_examples.ipynb --to pdf
When you run this command, you should see some output that tells you about the conversion process. nbconvert will display warnings and errors if there are any. Assuming everything goes according to plan, you will now have a py_examples.pdf file in your folder.
The conversion process for the other file types is quite similar. You just have to tell nbconvert what type to convert to (PDF, Markdown, HTML, and so on).
Use the Menu
You can also export your currently running Notebook by going to the File menu and choosing the Download as option.
This option allows you to download in all the formats that nbconvert supports. The benefit of using the menu is that you don’t need to learn the nbconvert at all if you don’t want to. However I recommend doing so as you can use nbconvert to export multiple Notebooks at once, which is something that the menu does not support.
Notebook Extensions
While Jupyter Notebooks have lots of functionality built in, you can add new functionality through extensions. Jupyter actually supports four types of extensions:
- Kernel
- IPython kernel
- Notebook
- Notebook server
This tutorial will focus on Notebook extensions.
What Are Extensions?
A Notebook extension (nbextension) is a JavaScript module that you load in most of the views in the Notebook’s frontend. If you are handy with JavaScript, you can even write your own extension. An extension can access the page’s DOM and the Jupyter JavaScript API.
Where Do I Get Extensions?
You can use Google or search for Jupyter Notebook extensions. There are actually quite a few out there. One of the most popular extension sets is called jupyter_contrib_nbextensions, which you can get from GitHub. This is actually a collection of extensions that is provided by the Jupyter community and installed with pip.
How Do I Install Them?
Most Jupyter Notebook extensions can be installed using Python’s pip tool. If you find an extension that can’t be installed with pip, then you will likely have to use the following command:
$ jupyter nbextension install EXTENSION_NAME
This only installs the extension but does not make it active. You will need to enable an extension after installing it by running the following:
$ jupyter nbextension enable EXTENSION_NAME
You may need to restart your Jupyter Notebook kernel to see the extension.
There is a nice meta extension called Jupyter NbExtensions Configurator that is worth getting for managing other extensions. It allows you to enable and disable your extensions from within the Jupyter Notebook’s user interface and also shows all the currently installed extensions.
Conclusion
The Jupyter Notebook is quite useful not only for learning and teaching a programming language such as Python but also for sharing your data.
You can turn your Notebook into a slideshow or share it online with GitHub. If you want to share a Notebook without requiring your users to install anything, you can use binder for that.
Google and Microsoft both have their own version of the Notebook that you can use to create and share your Notebooks at Google Colaboratory and Microsoft Azure Notebooks respectively. You can browse really interesting Notebooks there as well.
Project Jupyter recently launched their latest product, JupyterLab. JupyterLab incorporates Jupyter Notebook into an Integrated Development type Editor that you run in your browser. You can kind of think of JupyterLab as an advanced version of Jupyter Notebook. JupyterLab allows you to run terminals, text editors and code consoles in your browser in addition to Notebooks.
As always, it is best to try out a new piece of software yourself to see if it suits you and is worth using. I encourage you to give Jupyter Notebook or JupyterLab a spin and see what you think!
Further Reading
If you want to learn more about Jupyter Notebook, you can take a moment and read their excellent documentation.
For more information on Integrated Development Environments, you might want to check out the following articles:
Watch Now This tutorial has a related video course created by the Real Python team. Watch it together with the written tutorial to deepen your understanding: Using Jupyter Notebooks


